How to Install Fish Finder: A DIY Guide

Recently invested in a fish finder for your boat?
You must be pretty excited about getting out on the water to try it out.
The first thing you need to do is get it set up on your boat.
Here, we’ll offer some tips on how to install fish finders for the best performance.
Where and how to install a fish finder will depend on what type of boat and fish-finding system you have, so bear with us as we run through your options.
Is It Hard To Install a Fish Finder?
The difficulty of installing a fish finder will depend largely on where you are choosing to mount it.
If you have a new boat and want your fish finder display to be flush-mounted, you need to be confident with both a jigsaw and drill.
On the other hand, binnacle-mounted fish finders just require the use of a drill.
If you have opted for a through-hull transducer, we recommend letting a professional complete the job.
But transom-mounted fish finders can easily be installed yourself, as we’ll explain later.
How Much Does It Cost to Install a Fish Finder?
Installing a fish finder will take even a seasoned pro a good couple of hours.
Therefore, if you decide to take your boat and basic fish finder to a professional, you should expect to pay anywhere between $200 and $400 for the job.
The price will depend on your hired expert’s hourly rate.
It may even be more expensive if your fish finder has more than two units that require installation.
How to Install Fish Finder
Even the most basic fish finder installation will involve two separate installs: one for the fish finder display unit and one for the transducer.
You also need to know how to install a depth finder on a boat, which is fairly quick and easy, too.
Step 1: Prepping the Installation Tools
The first thing you’ll need to do to learn how to install fish finders is to make sure you have all the right tools and equipment ready.
Doing this will save you time and energy from having to run to the hardware store every five minutes.
In a nutshell, pack these tools in your bag:
- Drill
- Screw gun
- Jigsaw (for flush-mounted units)
- Masking tape
- Pencil
- Sealant (watertight)
Aside from the installation steps, you would also want to learn how to wire the fish finder into your fuse box.
Make sure you have everything you need from both lists before you start.
Step 2: Installing the Display Unit
Once you have everything you need, you’ll need to decide where to place each unit for the best results.
Where Do You Mount a Fish Finder Display?
There are a couple of different fish finder installation options for the display screen.
Ultimately, your choice will depend on whether you have a console and whether you want it flush-mounted.
Smaller consoles or smaller boats may not have enough space for flush-mounting, so you’ll need a third-party mount.
This mount may or may not come with the fish finder.
Flush-Mounted
If you are comfortable with cutting through your dashboard or boat, the first thing you need to do is to figure out if and where the fish finder will fit.
If you don’t have a console, some boats have a convenient wedge-shaped panel at the bow, which the fish finder will drop into.
Check that you have enough depth for the unit, and then double- and triple-check that you won’t be cutting through any wires.
If you don’t have enough space for flush-mounting your device, you may need to consider using a binnacle mount.
Binnacle-Mounted
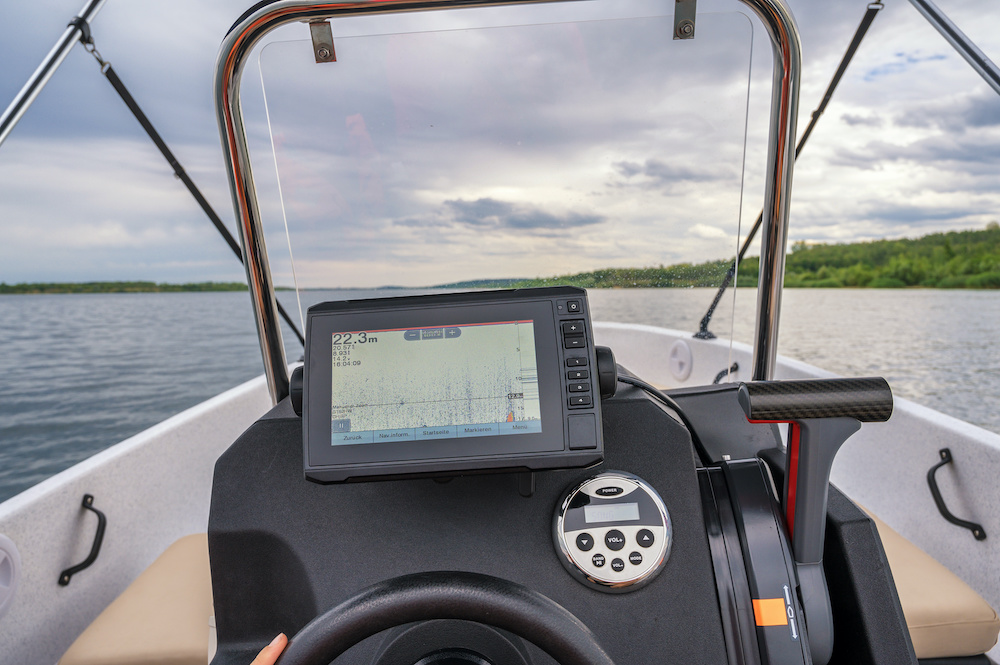
Apart from saving you space, a binnacle mount may also be able to offer you a better viewing position than a flush-mounted display.
What’s more, they are a little easier to install.
Sit in your usual fishing or trolling seat and take a look around you to figure out where you have space to install the mount.
The best location will obviously be somewhere highly visible.
It should also not get in the way of your gear.
Some binnacle mounts may give you the option to swivel the screen around so that you can see the display from a variety of locations in your boat.

How Do You Install a Fish Finder Display?
Once you know where you want your fish finder display, it’s time to start the real work.
Flush-Mounted
Stick your fish finder template to the position you want it in with masking tape and draw a line around it with a pencil.
Drill a pilot hole in one corner of the template, making sure that it’s big enough for your jigsaw blade to pass through.
Then, you just need to saw around your template line to cut out the entire piece.
When drilling and cutting, make sure you do so on its highest setting.
This is so that the drill bit or blade doesn’t snag and splinter the edges of where you're cutting.
The inder’s template will also show you where to drill four mounting holes, so you can go ahead and drill those out now.
Before dropping the display unit into place, run some sealant around the edges of the cut-out space and on top of your mounting holes.
The sealant will help ensure that water can't get in behind the unit and protect the bolts from corrosion.
Afterward, simply drop the unit into place and bolt it down.
Binnacle-Mounted
As mentioned, mounting your fish finder this way is much easier, as all you need to do is drill the holes for the mount.
Don‘t forget to drill an extra hole for the connecting wires to run through.
Run a bead of sealant around the mounting area, bolt the binnacle mount into place, and then attach your fish finder display.
Step 3: Installing the Transducer
Next up is knowing where and how to install the transducer.
Getting the location right is critical in ensuring you get the best performance and a clean image out of your fish finder.
Where Do You Install a Transducer?
If you have an inboard boat, a through-hull transducer is a must because turbulence from the prop wash can negatively affect its performance otherwise.
Typically, through-hull mounts also offer the best performance.
However, due to the fact that it requires drilling a large hole through the center of your boat, we recommend you leave it to the experts.
For outboard boats and most smaller boats, transom mounts are the way to go and much easier for DIYers to handle themselves.
Crouch behind your transom and find a location that is as deep as possible, with no obstruction from strakes or intakes that may disturb the water flow.
Follow the manufacturer’s guidelines on how deep the transducer needs to be submerged, as down scanners and side scanners have different needs.
Remember that it’s the running line that counts instead of the boat’s waterline at rest.
How Do You Install a Transducer? (Transom Mount)
Once you’ve identified the ideal location for your transom bracket, mark out the spot using the mounting template.
Before attempting to install the transducer, feed the connecting wires into your boat.
Drill holes in the template for the mounting screws and completely cover the area and screws in sealant before bolting the bracket into place.
When working below the waterline, it’s essential to use a sealant that is suitable for the job.
Alternatively, you can use a transom saver block, which you can stick to your transom with a special adhesive.
Then, mount your transducer bracket to this block instead.
Once your bracket is mounted, all that’s left to do is attach the transducer to the bracket and then connect all of the wires.
Don’t attempt to cut your transducer wire to size, as this could cause problems with performance.
Instead, pull all of the excess wire to either sit behind the display unit or in with your other electrical wires, coiling and tie wrapping it neatly into place.
Are Portable Fish Finders Any Good?
If installing a fish finder sounds like too much hard work, a portable fish finder is a great alternative.
Portable fish finders will work just as well as their installed counterparts.
Owning a portable fish finder allows you to skip the installation process entirely.
The downside is that they require setting up each and every fishing trip.
Because of this, some people prefer to have their fish finder installed to make every fishing trip that much easier.
Install and Away You Go!
Now you know how to install a fish finder, you also know how to install a depth finder on a boat as they both use the same sonar technology.
The important thing is to make sure that the transducer isn’t obstructed by anything that may affect its performance.
The most essential part of this entire journey is the location of your transducer.
Always read the manufacturer’s instructions on where to place the unit.
This is because the type of transducer you have and the mount that came with it will dictate exactly where it should be placed.
If you don’t get the location right, your fish finder may not offer you the performance you were promised.
If in doubt, it is well worth the extra money to pay for someone else to do the job for you.


